Objectives
Students will know how dissolved oxygen enters water and be able to explain at least two variables that affect the amount of dissolved oxygen in water.
Overview
Rating:
- Students brainstorm what organisms need to survive
- Teacher demonstrates presence of oxygen using cups of water
- Students use dissolved oxygen kits to test samples of water
- Students shake samples and retest water
- Students record and discuss results
Materials
For demonstration:
- Plastic cups and tap water
- Lab handout
For each group:
- Plastic cup and water
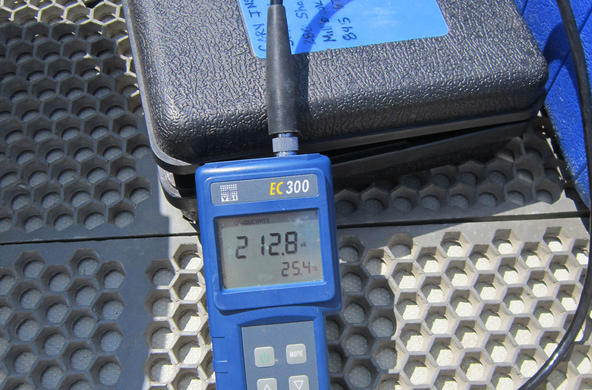
- Dissolved oxygen test kit or probe
- Canning jars filled to the top with water that was boiled for 20 minutes
Procedure
Preparation: Boil water for twenty minutes and then carefully pour it into canning jars. The water should reach the top of the jar so that no air is left in the sample. CAUTION - Jars will be hot! Use oven mitts or canning equipment to help you. Seal the jars and allow the samples to cool before distributing to students. Depending on the type of kit you are using, you will need different amounts of water. The CHEMetrics test kits require the least amount of water; 100 mL is plenty for each test, while the titration kits (HACH, Lamotte) will require at least 500 mL or more. Dissolved oxygen probes work well for this experiment.
Both HACH and Lamotte make relatively accurate dissolved oxygen test kits for students at the high school level, but requires students to follow directions carefully and follow proper safety procedures. There is also a very simple test kit available, CHEMetrics, which takes significantly less time, doesn’t involve any powders, and is reasonably priced (about $45for the initial kit, and about $1 per test for refills). This is a good option if you aren’t interested in students learning how to do the chemical tests properly, or you have limited time. You should also decide whether you will have the students find percent saturation or parts per million (ppm). Most kits will measure mg/L, which can then be converted into percent saturation using the temperature of the sample. Parts per million is another way of saying mg/L, which is the weight of oxygen dissolved in a liter (or 1 kg) of water. To get more information on this topic, visit: http://waterontheweb.org/under/waterquality/oxygen.html
Engage:
Before class (at least thirty minutes prior), fill a few cups with water and place them around the room. Show the students the class aquarium (if you do not have a class aquarium, show pictures or the live webcast from the Monterey Bay Aquarium: http://www.mbayaq.org/efc/cam_menu.asp ). Ask: how do the animals and plants in the water stay alive? Allow the students to brainstorm possible answers. If students are hesitant to answer, have them write down their answer on a piece of paper and check it with a partner (think-pair-share). Ask students to view the plastic cups with water and describe what they see: bubbles should be visible on the sides of the cup. Ask students to explain where these bubbles came from. As water comes to room temperature, nitrogen and oxygen gas slowly come out of solution and adhere to the imperfections of the sides of the container - this demonstrates that there are molecules of gases (including oxygen) in the water, just like there are molecules of water (vapor) in the air. Fill a few new cups with water so that the students can observe the changes during the class period.
Explore:
Day 1: Distribute the lab handout. Ask students to read the short introduction and make a prediction about which water sample will contain the most oxygen: tap, boiled water, or shaken boiled water. Ask students to explain their prediction (whiteboards work well for checking students’ ideas), and encourage them to consider how they might find out the answer. Students should be arranged in groups of 3-4. Each group should obtain a cup of tap water and a dissolved oxygen test kit. Allow the students to complete the DO test on the tap water by following the directions (this is the control, and also provides a chance for students to experience using the test kits/probes). They should write their results on a chart on the board. Stop and check students’ results – if a few groups have very different results, encourage students to think about why. Make sure all groups are following the test kit procedures. Note: If using the CHEMetrics tests or a probe, you can probably complete all parts of the lab in one class period.
Day 2: Students should be arranged in the same groups. Each group should receive a sealed jar. Immediately after opening the sealed jars, the students should test the sample (being careful not to add air by shaking or moving the jar too much). Students should record the results. Next, ask students to pour half of the water from the jars down the drain. They should cap and shake the jar, then uncap, recap and shake again. This is repeated several times before the students test for DO again. Results should be recorded.
Explanation:
Day 1: Oxygen is just as important to the animals and plants that live in water as it is to those of us who don’t. Oxygen in the water is dissolved oxygen gas, which usually comes from the air and enters the water at the surface, where it slowly dissolves. The oxygen then diffuses in the water, very slowly-about 300,000 times more slowly than it does in air. As a comparison, students should know that the air is 21% oxygen, while water has less than 1%. If the water isn’t mixed often, then dissolved oxygen has a hard time reaching some parts of the water column. There are generally three ways that oxygen enters the water column-through wind/wave action, through direct diffusion, and through photosynthesis. Wind and wave action includes things like the tides, lake turnover, etc. There are many variables that affect how much oxygen is in the water, including the amount of photosynthetic life, water temperature, altitude, turbidity, etc.
Day 2: Students should now be ready to discuss what types of changes might occur in a stream/river ecosystem that would affect the amount of dissolved oxygen. Ask: Please list the reasons why a stream or lake might have more dissolved oxygen. Students should be able to recognize that mixing affects the amount. Encourage students to think of ways in which a water body would be mixed-wind, tides, lake turnover, eutrophication, storm water runoff. Students may also mention temperature – colder water holds more oxygen than warmer water (see the lesson on Dissolved Oxygen and Temperature). Point out that the water that was boiled has almost no oxygen. Students may mention photosynthesis, but not necessarily (see the lessons on photosynthesis and respiration in this module for ideas on how to teach this to students). This is also a good time to talk about variability in the results. Why didn’t everyone get exactly the same numbers? What does this mean about the variability in testing procedures, etc? Encourage students to explain the differences. They should average their numbers to get a result and discuss ways in which they could make their results more uniform in the future.
Extend: If time permits, try sampling water (as a demonstration for the class) using a larger jar of boiled water. Open the jar and let it sit for an hour. Then sample the water from the top and the bottom of the jar (use a siphon to take the bottom sample, or use a probe). You should see a difference.
Evaluate:
Day 1: Students should read the Dissolved Oxygen reading and answer the corresponding questions.
Day 2: Students should write a lab report on the activity, including a chart with the class results. Consider creating the scatterplot and discussing variability of the results as a class. Students should be able to explain the difference in DO in the sample before and after it was exposed to air, and should have an idea of why temperature affects dissolved oxygen levels.
Standards
Benchmarks for Science Literacy
1B Scientific InquiryNYS Standards
MST 3- Mathematics in real-world settings, MST 4- Physical setting, living environment and nature of scienceCredits
Modified with permission from: “Oxygen for Life” 1997. Living in Water, National Aquarium in Baltimore, Kendall Hunt Publishing, Iowa.


