Objectives
Students will know how to test for salt pollution in a water sample and will be able to explain whether their sample is contaminated by salt.
Overview
Rating:
1. Students practice testing for conductivity with samples from home or the school, or bottled water samples, and convert to chloride.
2. Students test the collected water samples, convert to chloride, and color code their sampling map based on the reference table.
3. Students complete the lab sheet, applying what they have learned about variability.
4. Students compare their data with scientists' data from Lesson 2.
Materials
- Tap/surface water samples
- Google map of your school district
- Copies of student worksheet – Is it too salty?
- Copies of reference table – Salt Pollution Reference Table
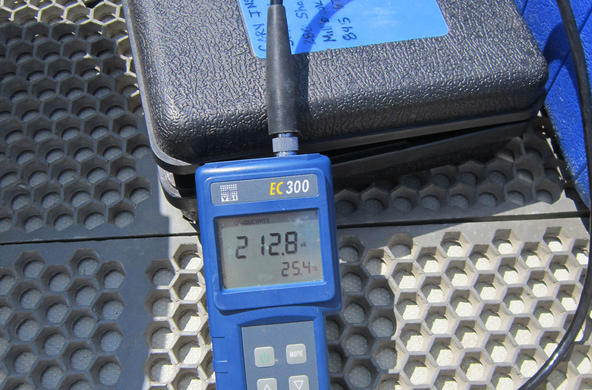
- Conductivity probe (OR chloride test kit)
- Water samples from outdoor collection
- Calculators (optional)
- Copies of optional reading on Conductivity, reading questions on Conductivity
Procedure
Teacher note: The conductivity to chloride conversion equation is dependent on location and time of year and should technically be developed separately for each stream. However, conductivity meters are relatively cheap and exist in most schools, as opposed to chloride meters, so we have provided a "stock equation" for this lesson (the same equation as in the Salt Pollution Reference Table).
(conductivity + 20) / 5.2 = chloride
If you are able to develop your own equation, that would be ideal, but we recognize that most schools will not have this capacity and thus provide this equation. You will need to have your students write the equation on the bottom of page 1 of the "Is it salty?" worksheet.
- Engage: Ask students to bring their tap/surface water (or bottled water) samples to the front of the room for conductivity testing. Project a map of your school district and label where each water sample came from, paying attention to whether students have wells or get their water from another source. Test a few samples for conductivity, keeping track of results on a class data table. Students may be surprised at the high values – discuss the different ways in which conductivity can change in a water sample, and how bottled water companies may add ions that could affect the conductivity.
- Teacher background: Remind students that just because conductivity is high, or seems high, that does not necessarily mean that the water is polluted. Alternatively, you can watch a YouTube video that tests a variety of bottled waters for conductivity: http://www.youtube.com/watch?v=cwL457B6fGw&feature=player_embedded (or search for PolitiFact Virginia: water quality testing). Bottled waters usually test high for conductivity because of the bedrock the water is flowing over which adds dissolved ions to the water. The argument in Virginia’s streams relates to mountaintop mining, which the EPA claims increases the conductivity values of the streams to an unhealthy level (EPA conductivity standard for Appalachian streams is 500 µS/cm). Opponents of the EPA say that conductivity is not a good measure of stream health, since bottled waters can be high as well. Most scientists who have looked at these data argue that the EPA has found a correlation between high conductivity values and loss of aquatic organisms, especially in Appalachian streams, and thus high conductivity is an indicator that something is wrong in an aquatic ecosystem. (Just a reminder - that correlation does not hold true for all ecosystems in all places. For example, salt water has much higher conductivity values, but still harbors plenty of biodiversity.)
- To further explore the idea of conductivity, add salt to one of the water samples. Retest the sample for conductivity, illustrating to students how salt can affect the values because it is changing the way electricity is moving through the water sample. Calculate the chloride values for one of the samples so that students understand how to move from the conductivity value to the chloride value. Optional: A reading is provided on conductivity.
- Explore: Students should now begin testing their collected water samples for conductivity, keeping track of concentrations on the map of their sampling sites. Students will then need to convert the conductivity value to chloride. Depending on the availability of probes/test kits, this may need to happen in small groups or as a whole class.
- Explain: Using the “Water Quality Reference Table” students can color code each sampling location (on the map that they drew) based on whether it is safe (background), harmful to some biota, at or above the drinking water standard, or lethal. This will help them make sense of their data values, and help them make a claim about their data later in the lesson.
- Extend: Ask student to think about the possible relationship between land use and water quality (as related to salt pollution). Ask: If you lived in a city where 80% of the surfaces were impervious, how would that affect the chloride levels in the stream?
- Evaluate: Students should proceed through the Is it too salty? lab sheet, creating the graph and answering the questions as appropriate. Ask students to think about the variability that exists in their data, and whether there are things they could have done to improve their investigation ( how confident are they in their data). Pay particular attention to the students’ graphs (in discussion question #1). Students should show all of the averaged group data along with a line that demonstrates the average of the entire class. Then, they can answer the question about variability around the average.
- Evaluate: Ask students to compare their data with the scientists’ data from Lesson 2, and discuss some of the possible reasons for the differences (sampling equipment, methods, replication, location, weather). The graph of chloride changes in the treatment plot (the one where flowback water was applied) is provided in the worksheet. Ask students to reflect on what they are not testing for with this activity, specifically as it relates to hydrofracking.
Resources
Lesson Files
pdf
Salt Pollution Reference Table
pdf
Student Worksheet
pdf
Worksheet Answer Key


